Building my SFG planters
 During the summer of 2006 I started a very small container garden consisting of one “elevated” bed and one ½ wine barrel. I grew a cucumber, 2 bell peppers, 3
I like the idea of using containers. I decided to elevate my containers about two feet off of the ground to make it easier to tent to the plants. Last year I constructed a 2'X6'X18" elevated bed using 4X4 redwood posts for the legs and cedar fence boards for the sides and floor. I made my own trellis using cedar. I used regular potting soil and fertilizer. All in all I thought it all turned out pretty good for a newbie. This year (2007) I will try the square foot method, here’s how I intend to go about it.
Instead of building planters that will sit on the ground, I'm going to build elevated planters (3 of them). The top of the planters will be 2 feet off of the ground, which will minimize the amount of bending and kneeling needed to tend to the garden. This year instead of cedar I’m using redwood, but only because the redwood fencing (untreated) was on sale. Either way, cedar or redwood, both will last a long time.
Here’s the materials list (per bed):
1 – 2’X4’X8’ rough cut redwood board.
6 – 5/8"X8"X6’ redwood fence boards
2 – 1"X2"X8’ trim material (I don’t know what kind of wood this is, probably fir or pine)
Lots of 2" and some 1" 18 gauge brads, or wood screws
Staples
Landscaping fabric
Equipment:
Circular saw or chop saw
Air compressor and brad gun or a drill if using screws
Jigsaw
Staple gun
The materials listed above will make one elevated bed, 6' long, 2' wide and just under 6" deep. I decided not to make the beds any wider because anything over 2' will require additional support lengthwise along the center; also, all the plants can be easily tended from the front of the planter.
This is the uncut material .. enough for two 6'X2'X6" planters. 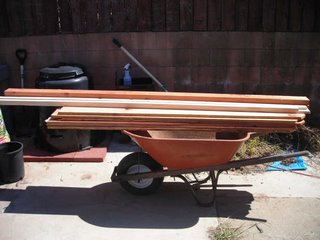
I cut the redwood board into four equal 2’ lengths to create the legs. The boards were just over 8' in length, so I had to trim off about a 1/8 inch or so of the last leg to be sure that they were all even. I just stacked the legs on top of each other, squared one end and then marked the excess on the long leg and trimmed it using the circular saw.
Next I cut 4 of the 6 redwood fence boards into equal 2’ lengths. Two of the 2' pieces will be the sides of the planter, the remainder will make up the floor. My circular saw could cut 2 boards at once, which saved some time.


Again, since the fence boards were just over 6' long I had to stack the boards and trim so they were all the same length.
Here is the cut material.
I created the ends of the bed first, connecting one of the 2’ pieces of redwood fence boards to two the 2’ pieces of redwood boards using 2" brads (and lots of them). 
The completed ends.
Using 2" brads, I connected one 6’ redwood fence board to each side of the frame, creating a bottomless box.
I created a ledge on the inside of the frame for the floor slats to sit on. I measured the inside of the box to be sure to get a snug fit. 
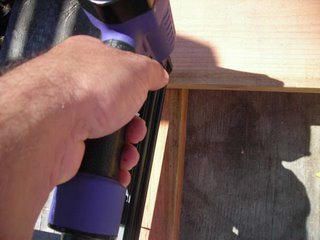
Using 1" brads I connected the trim material to the inside of the box to create a lip that the edges of the boards will sit on.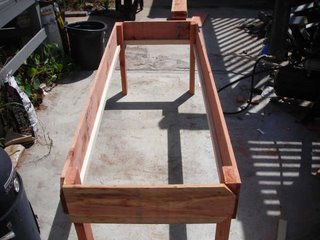
I used a jigsaw to trip away the corners of the end pieces so that they would fit around the legs. I only measured once and traced the remainder of the pieces using the first trimmed piece as a template.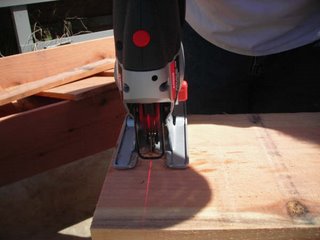
A snug fit. (Each planter will have 4 of the 2' fence boards that have the dog-eared ends. I used two as the ends of the box. I used the other two as the pieces to trim around the legs to maximize the amount of material on the lip).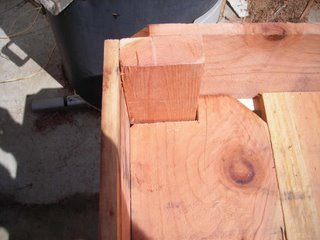
I placed the 2' fence boards on the inside of the planter to create the floor; 1 board should be left over. There will be a roughly 2" to 3" gap in the floor. I measured the gap and used the circular saw to cut the extra piece lengthwise to fill the gap.
A solid floor. The area between the slats is more than sufficient for drainage.
The completed bed. I stapled landscaping fabric onto the inside of the bed. (I don't know exactly why I did this; it just seemed like a good idea at the time.
I completed the second bed in the same manner and then moved them from the work area to the yard where I filled them with bedding material.